Set up x402 payment middleware
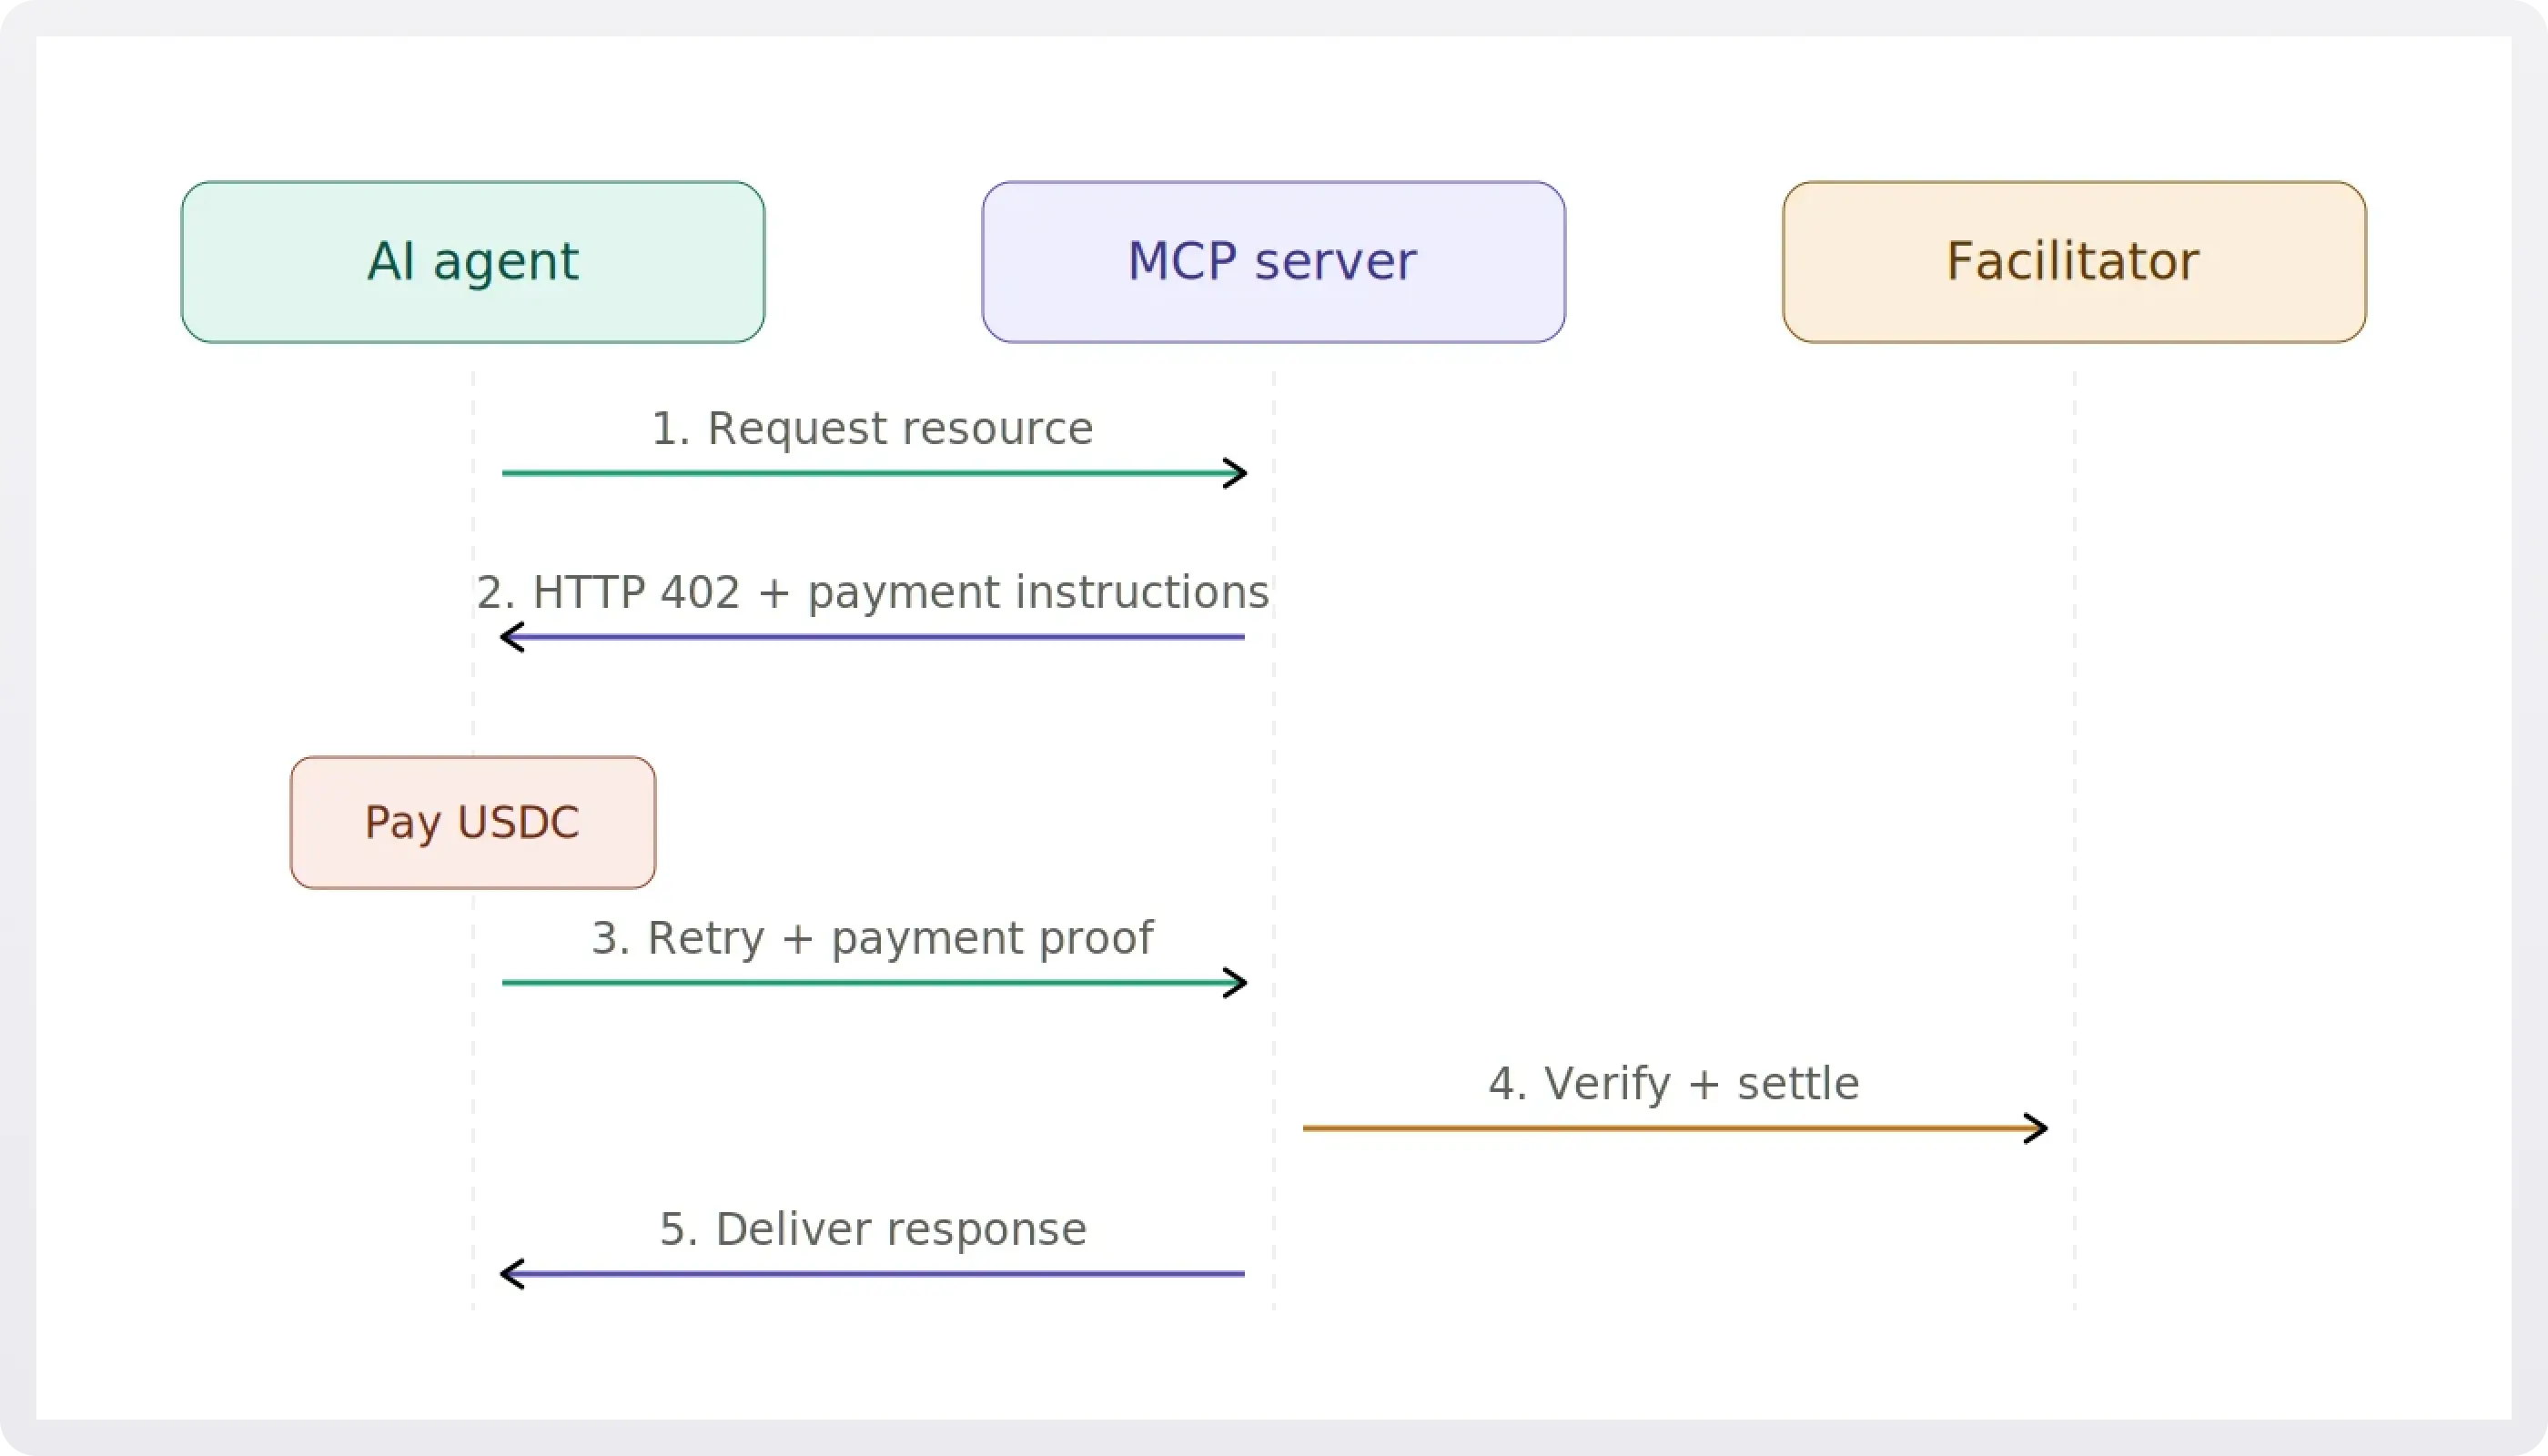
Before you can enforce KYC/AML checks behind a paywall, you need a middleware layer that handles the x402 protocol. This layer intercepts API requests, verifies payment, and routes traffic only after the buyer has settled.
The Coinbase Developer Platform provides the most reliable reference for building this infrastructure. Their documentation outlines how to structure your API to return HTTP 402 responses when payment is required, which is the core mechanic of x402 [1].
Start by installing the official x402 SDK for your backend language. This package provides the utilities needed to parse payment proofs and validate transaction hashes. Run npm install @coinbase/x402 (or the equivalent for your stack) to add the dependency to your project.
Initialize the middleware with your wallet address and currency preferences. The gateway needs to know where to receive payments and which tokens to accept. Configure the paymentAddress and allowedTokens arrays to restrict transactions to stablecoins or specific cryptocurrencies that match your compliance requirements.
Attach the middleware to your API routes. When a request arrives without a valid payment proof, the middleware should return a 402 Payment Required status. Include the Pay header in the response, which tells the client exactly what is needed to access the endpoint. This is the standard x402 behavior that allows AI agents and automated clients to understand the payment barrier.
Once the client resubmits the request with a payment proof, your middleware must validate the transaction on-chain. Check that the hash matches the Pay header and that the amount meets your threshold. If the proof is valid, allow the request to proceed to your KYC/AML logic; if not, reject it again with a 402.
[1] https://docs.cdp.coinbase.com/x402/quickstart-for-sellers
Integrate KYC verification logic
Embedding identity verification and risk assessment directly into your x402 endpoint workflow ensures that transaction processing only begins after regulatory checks pass. This integration transforms your API from a simple payment rail into a compliant financial gatekeeper.
The process follows a standard compliance sequence: identify the customer, assess their risk profile, and monitor for ongoing anomalies. By handling these checks programmatically, you reduce manual review overhead and prevent high-risk transactions from entering your system.
1. Implement Customer Identification Program (CIP)
The first step is verifying the customer's identity against official government records. Your x402 endpoint should accept identity data (name, DOB, ID number) and pass it to a verification provider. This step is mandated by the Customer Identification Program (CIP) under the USA PATRIOT Act.
2. Apply Customer Due Diligence (CDD)
Once identity is confirmed, assess the customer's risk level. Standard CDD involves checking against sanctions lists, politically exposed persons (PEP) databases, and adverse media. This step helps you categorize customers into low, medium, or high-risk tiers.
If a customer is flagged as high-risk, your workflow should trigger Enhanced Due Diligence (EDD). This may require additional documentation, such as proof of source of funds, before the x402 endpoint is authorized to process payments for that user.
3. Set Up Continuous Monitoring
KYC/AML compliance is not a one-time event. Implement continuous monitoring to detect changes in customer behavior or status. Your endpoint should periodically re-screen customers against updated sanctions lists and monitor transaction patterns for suspicious activity.
Automate alerts for any deviations from expected behavior. This proactive approach ensures that your x402 endpoints remain compliant even as regulations evolve and customer profiles change over time.
Validate compliance status before x402 trigger
Before your API sends an HTTP 402 response, you need to verify the user’s standing. If you trigger a payment for a blocked or flagged identity, you create a bad user experience and potential regulatory friction. The goal is to gate the payment request behind a clean compliance check.
Think of this like a toll booth. The x402 endpoint is the gate, but the compliance check is the barrier arm. If the arm is down (non-compliant), no amount of money (tokens) will move the car forward. You must resolve the status first.
Query your internal KYC/AML database or a third-party provider (like Sumsub or Onfido) using the user’s session ID or wallet address. Look for a status field. Common values include approved, pending, rejected, or flagged. If the record doesn’t exist, the user is effectively unverified.
If the database returns a score, compare it against your internal threshold. A score above your limit means high_risk. In this case, you should not trigger the x402 payment. Instead, return a standard 403 Forbidden or a custom error JSON explaining that manual review is required. Do not ask for payment to resolve a risk flag.
If the status is pending or the check has expired (e.g., KYC is valid for 12 months), you have two choices. You can block access entirely until re-verification, or you can allow limited access. For high-stakes financial apps, blocking is safer. Return a 402 with a specific message field: "Compliance check expired. Please re-verify to continue."
Only when the status is approved and the risk score is low should you proceed to the x402 logic. At this point, generate the payment request. The user’s compliance status is now the green light. If you skip this step, you risk accepting payments from sanctioned entities or high-risk actors.
This sequence ensures that your x402 endpoint is not just a payment gateway, but a compliant access control point. By checking status first, you avoid charging users who are legally or operationally blocked from your service.
Common integration mistakes to avoid
Even with a solid x402 endpoint, KYC/AML integration can fail if you treat compliance as an afterthought. The most frequent errors stem from poor error handling, skipping verification steps, and ignoring regulatory updates. Avoid these pitfalls to keep your service secure and compliant.
Skipping verification steps
KYC/AML compliance requires a thorough verification process. Skipping steps like document validation or identity checks can lead to severe legal consequences. Ensure your integration includes all necessary verification stages before processing transactions.
Poor error handling
Clear error messages are crucial for debugging and user experience. If your x402 endpoint returns vague errors, it becomes difficult to identify and fix issues. Implement detailed error logging and user-friendly messages to streamline troubleshooting.
Ignoring regulatory updates
Regulations change frequently. Failing to stay updated can result in non-compliance. Regularly review official sources like FinCEN or local financial authorities to ensure your integration meets current standards.
Inadequate data security
KYC/AML data is sensitive. Ensure your endpoint uses encryption and secure storage practices. Regular security audits can help identify vulnerabilities before they are exploited.
Verify your implementation
Before sending traffic, run through this checklist to confirm your x402 endpoint handles KYC/AML checks correctly. This ensures the payment gateway processes HTTP 402 responses as expected and that your compliance logic triggers reliably.
-
Dependency Check: Confirm all x402 libraries are installed and compatible with your runtime.
-
Status Code Logic: Verify the endpoint returns 402 Payment Required when identity data is missing or invalid.
-
Response Payload: Ensure the response body includes the necessary WWW-Authenticate header or JSON payload directing the client.
-
Compliance Routing: Test that valid KYC/AML checks bypass the 402 state and return the protected resource.
-
Error Handling: Confirm that malformed requests return clear error messages without exposing internal infrastructure details.
Use the official Coinbase x402 seller documentation as a reference for standard integration patterns if you encounter edge cases during testing.
Frequently asked questions about x402 and KYC
How does x402 handle sensitive KYC data?
x402 endpoints treat identity verification as a paid service, meaning the microtransaction covers the cost of secure data processing. When a user submits documents for KYC/AML checks, the data is transmitted through encrypted channels. The endpoint verifies the payment before processing the sensitive information, ensuring that compliance costs are covered without exposing the user to hidden fees.
Is x402 compliant with AML regulations?
The x402 protocol itself is a payment layer, not a compliance engine. However, it facilitates AML (Anti-Money Laundering) compliance by enabling real-time, auditable transactions for verification services. Developers must integrate the x402 payment flow with existing KYC providers who handle the actual risk assessment and regulatory reporting. This separation ensures that the payment mechanism remains neutral while the verification partner meets legal standards.
What happens if a KYC payment fails?
If the x402 payment transaction fails or is rejected, the endpoint does not proceed with the identity verification process. This prevents unauthorized access to sensitive personal data. The user receives an immediate error code indicating the payment status, allowing them to retry with a different wallet or payment method before re-submitting their KYC documents.
No comments yet. Be the first to share your thoughts!